
Sunday, October 20, 2013
Wednesday, June 26, 2013
Chocolate Peanut Butter Banana Popsicles - I Will Create Food!
Sometimes the simplest desserts are the best. Ask anyone that has had a S'more. Some of the best warm weather treats are frozen banana popsicles. The simple combination fruit and chocolate never fail to satisfy. To add another layer of awesome to our popsicles, we've started to add a layer of peanut butter. They are amazing!
 First
FirstYou will need:
A couple of ripe bananas
a few tbsp of your favorite peanut butter (we use all natural peanut butter to keep the popsicles from getting too sweet)
one bag of dark chocolate or semi-sweet chocolate chips
Toothpicks


This can get messy.
Once you get all of your banana/peanut butter sandwiches made pop them into the freezer for a bit. It'll help when you dip them. While you're waiting, melt your chocolate in a shallow bowl.


Monday, June 17, 2013
Eat from the Street - Beacon Food Forest

Seattle has long been a place where urban living and nature have coexisted. We boast being one of the top 10 cities in the US for access to parks. We are called the Emerald City even. So it should come as no surprise that planning and construction is underway for an entirely edible and FREE forest of food. The Beacon Food Forest is underway next door to Jefferson Park in Beacon Hill. The Food Forest is being designed to mimic a natural ecosystem but substituting edible nuts, fruits, veggies and herbs throughout. Phase One, consisting of building the fruit and nut tree grove, has already begun. The Food Forest will progress over the next several years. If you like to visit and/or volunteer at the Forest, more information can be found here: http://beaconfoodforest.weebly.com/

Saturday, June 1, 2013
Explore Imagination - Fantasy Exhibit @ The EMP

There is a inherent draw to fantastic worlds and stories in all of us. Mythical creatures, epic battles, magical duels...these things fill the stories and games that entertain us. So the Fantasy exhibit at the EMP is a great peak behind the curtain of the things that captivate us. With items from The Wizard of Oz to original manuscript pages from The Lord of The Rings (Plus a Dragon!) The exhibit gives a taste of many of the iconic stories from the fantasy genre. The only downside is you will want more. As an added bonus, your ticket to the Fantasy exhibit also gives you admission to the Can't Look Away Horror exhibit, the Icons of Science Fiction exhibit and the entire EMP Music exhibit. (we talk about it here)
EMP Fantasy Exhibit


Thursday, May 9, 2013
Homemade Marshmallows - I Will Create Food!

You will need:
3/4 cup powdered sugar
1/2 cup cornstarch or potato starch
Cooking spray, for coating the baking pan
4 1/2 teaspoons unflavored powdered gelatin (about 2 [1/4-ounce] packets) 3/4 cup cold water
3/4 cup granulated sugar
1/2 cup light corn syrup
1/8 teaspoon fine salt
2 teaspoons pure vanilla extract
Besides the ingredients you will also need an 8x8 pan and an electric mixer with a whisk attachment

Start by mixing the powdered sugar and corn starch together. This will be a powder coating to prevent the marshmallows from sticking together.


Now add the sugar, 1/4 cup of the corn syrup, remaining 1/4 cup water, and salt in a medium saucepan. Bring it to a boil, stirring until it hits 240 degrees. While waiting for the right temperature, microwave the gelatin for 30 seconds. Add the rest of the corn syrup and the gelatin to you mixer and start it on low.
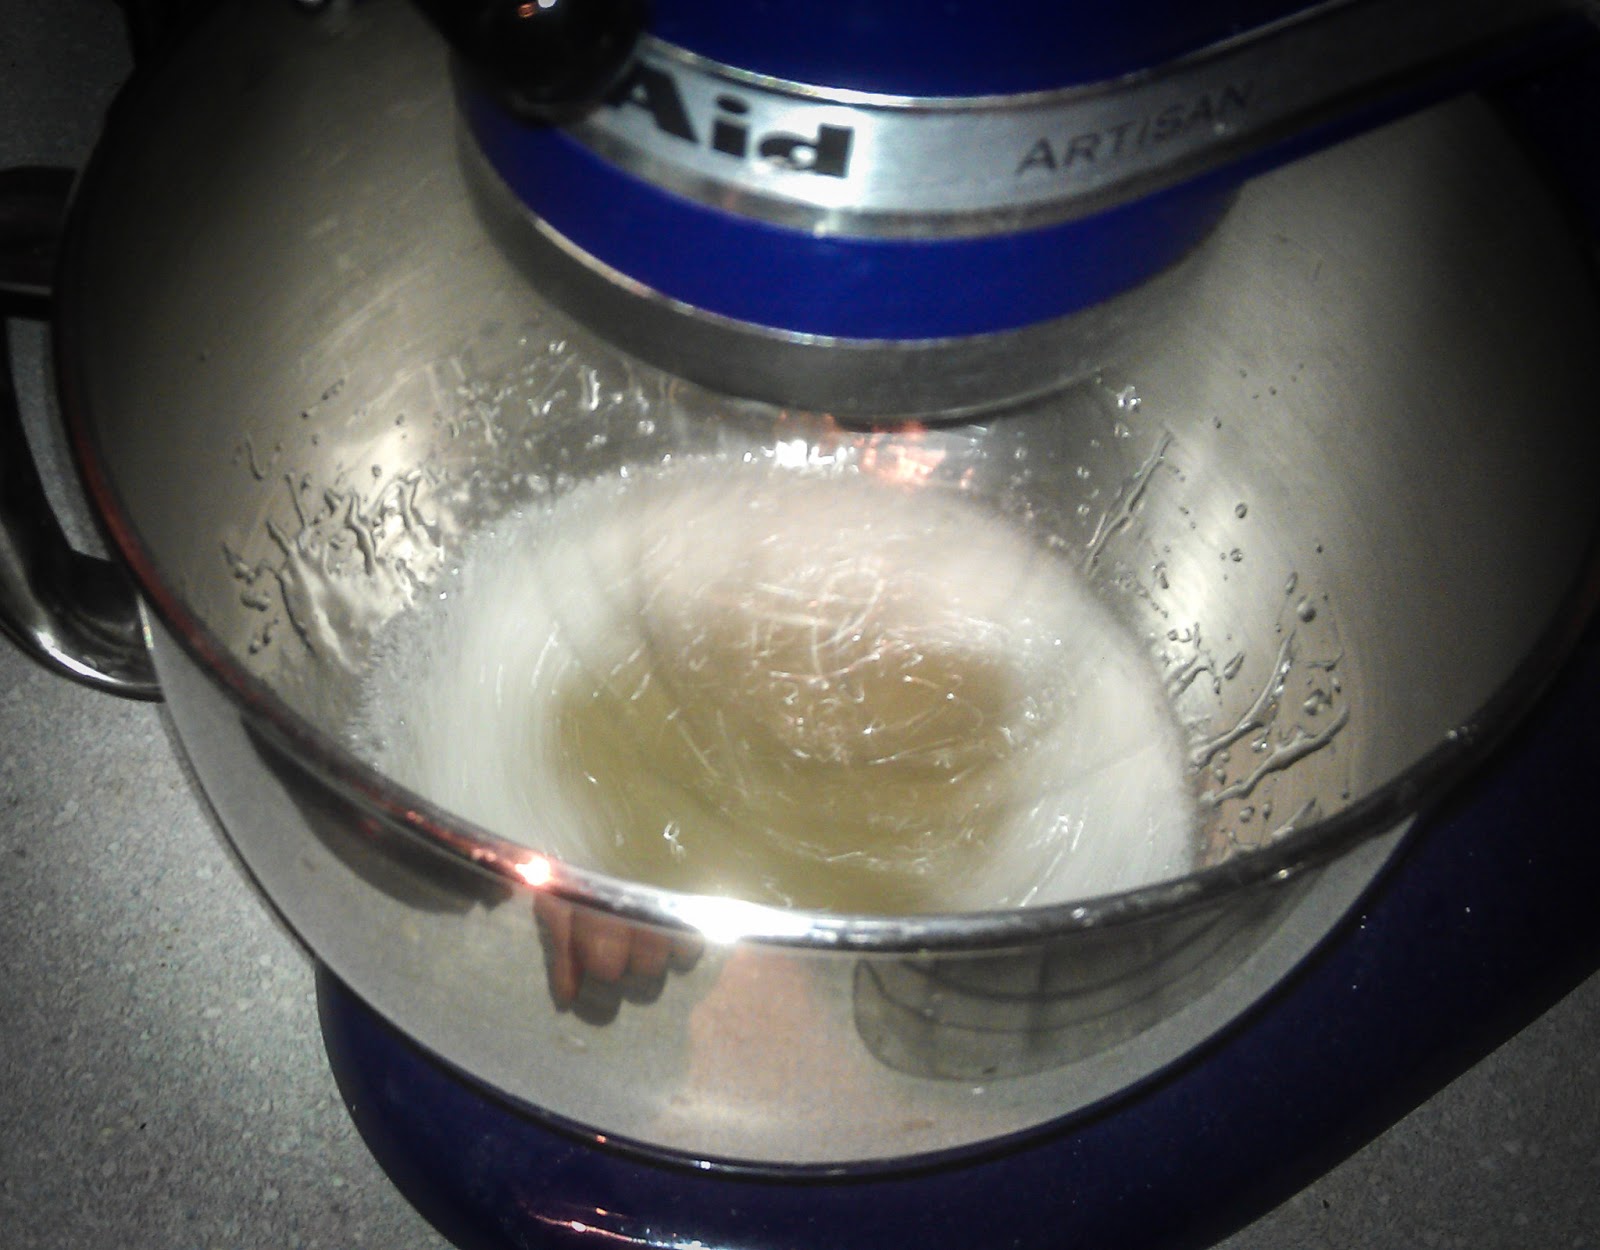

Your mixture should be looking mighty fluffy at this point. Add your vanilla (and/or any other flavors you want) and increase the speed to the highest setting for a few minutes.


When they are all set up, flip the pan over onto a cutting board. Use a pizza cutter dusted with your powder mixture to cut out bite-sized marshmallows.

After cutting, toss each piece in the powder mixture to prevent them from sticking together and store in an airtight container. They will keep for several weeks (although they probably won;t be around for that long)
Saturday, May 4, 2013

Monday, April 29, 2013
May The Fourth Be With You - Star Wars Day

You can:
1. Watch all 6 movies (this one's obvious, but important nonetheless)
2. Have a lightsaber battle throughout your neighborhood (bonus points if you can get passerbys involved)
3. Go to a bar/restaurant with a live band and convince them to play the song from the Cantina bar
4. Have a Wookie calling contest from the tallest hill you can find
5. Head to Card Kingdom and try one of the several Star Wars themed games
6. Have a creative party and craft yourself some awesome Star Wars tchotchkes (head over to StarWars.com for some great ideas)
7. Get a Star Wars themed tattoo (only for advanced Fans)
8. Host a dramatic reading of one of the many Star Wars novels
9. Take some time to create your own Star Wars fan film (See ours here or check out some awesome ones here)
10. Be Vader for a day and tell your kids you are their father (or mother) in a loud and raspy voice as much as you can
Whatever you do, Have Fun! And May the Force be with you!
Scream For Ice Cream - Free Scoop Day @ Cupcake Royale

Sunday, April 28, 2013
Spare Gutter + Soil = Recycled Planter - Create A Custom Window Box

Historically our house has had a love/hate relationship with gardens. We love to garden and hate it when our plants die. This year the 4-year-old has made it his mission to change that. He has been the driving force behind our renewed gardening efforts. He has selected the plants, set a watering schedule and loving placed random toys in the planters. We needed more planting room in a limited space so we created our own planter from a recycled gutter. First we drilled some drain holes along the bottom of the gutter about 18" apart. After cleaning the gutter, we filled it with soil and planted some lettuce and basil. A couple of zip ties to attach it to the railing and our planter was done. Our balcony is beginning to look like an oasis thanks to our little green thumbed gardener.

Revel In Stories of Derring Do - Free Comic Book Day

Everyone dreams of being a superhero. Even if it's just a little bit. And as super powers tend to involve things such as radiation, mutation and/or death of a loved one, I've stopped trying to get them. The next best thing is living vicariously through the people who have them. That's where Free Comic Book Day comes in. Free Comic Book Day is the first Saturday of May (this year is May 4th) in which comic book companies give out special comic books through your local comic book store to introduce you to new heroes and story lines. It's a great way to explore and expand you comic book knowledge. And possibly find new powers to dream of. http://www.freecomicbookday.com/StoreLocator
Thursday, April 25, 2013
Walk Into Fantasy - Fremont Troll

Monday, April 15, 2013
Homemade Mozzarella - I Will Create Food!

First off you will need to find rennet. Rennet is a group of enzymes that can be animal or plant based. If you live in the Seattle area we found ours at The Cellar Homebrew on Greenwood Ave or you can order it from a variety of sources including Amazon and New England Cheese Making Supply Company. It's pretty inexpensive and will make many batches of cheese.
You will also need Citric Acid which you can buy at most cake decorating shops or online.
You will need:
1 gallon of milk - NOT ultra-pasteurized (it should say on the label whether it is or not) You can use any type of milk (whole, skim, 2%) but the lower the fat content the less cheese you get in the end.
Rennet
Citric Acid
Salt (to taste)
Stainless Steel pot
Thermometer

Begin by prepping your citric acid and rennet. Dissolve 1 1/2 teaspoons of citric acid into 1/2 cup cold water. Also mix 1/4 teaspoon liquid rennet, or 1/4 tablet of rennet, into 1/4 cup of cold water.

Pour your milk into a large stainless steel pot and start gently heating it to 55 degrees. At 55 degrees add the citric acid and stir thoroughly.

Continue heating the milk until it gets to 90 degrees. At 90 degrees add the rennet, mixing in an up/down motion. Cover and continue heating until it gets to a little over 100 degrees.

You should see the cheese curds forming(don't over stir it as it breaks up the curds into smaller bits...we learned the hard way) Scoop out all of the curds you can into a large microwaveable bowl

Now gently press out as much whey as possible. Once the whey is pressed out, pop it into the microwave for 1 minute. Take it out and press some more whey out. Gently knead the cheese to get it evenly heated. Put it back into the microwave for another 30 seconds and knead it again. One more time at 30 seconds and kneading.

On this last kneading add salt to taste while kneading to evenly distribute it though the cheese.
Once the cheese has a taffy like consistency it's done. You can braid it, cut it into strips for cheese sticks, roll it into little balls...
Subscribe to:
Posts (Atom)