Dragons...That's all it should take to entice you to the Lunar New Year celebration in the International District. To celebrate the New Year the international district puts on quite the shindig with dancing, parades, food tasting, kid's costume contest and so much more. So head down to the ID and celebrate the Year of the Horse...and keep an eye out for Dragons. More Info
I'm A Pacific Northwest Dad Who's Always Looking For Fun, Interesting Things To Do With My Kids
Friday, January 31, 2014
Sunday, January 26, 2014
Homemade Reese's Cups - I Will Create Food!
Kids love candy. That goes without saying. In my quest to give my kids slightly better alternatives we have been creating our own versions of various candy. Their current favorite is our take on Reese's cups. They are easy to make, but sadly don't last very long around here.
You will need:
1 Cup Peanut Butter - We use creamy but crunchy works just as well. We also use organic peanut butter to make them just a tiny bit healthier.
1 1/4 cups graham crackers - All natural as well (every little bit helps)
1 package of chocolate chips
First crush your graham cracker. I use our food processor to make sure the grahams are nice and fine.
Next add in your Peanut butter.
If you have one of these push measuring cups it makes measuring the peanut butter so much easier!
Thoroughly mix the peanut butter and graham crackers until they are a play dough like consistency.
Once it's thick enough to form it with your hands, roll it into balls and put in on a cookie sheet covered in wax paper.
Once they are all rolled pop them in the freezer for a few minutes to harden them up.While your waiting, melt you chocolate chips.
Once their set up you are ready to start dipping.
Make sure you cover them completely.
Once they're coated, put them back in the freezer for a few minutes to allow the chocolate to set up.
Try them before they disappear!
Sunday, October 20, 2013
Wednesday, June 26, 2013
Chocolate Peanut Butter Banana Popsicles - I Will Create Food!
Sometimes the simplest desserts are the best. Ask anyone that has had a S'more. Some of the best warm weather treats are frozen banana popsicles. The simple combination fruit and chocolate never fail to satisfy. To add another layer of awesome to our popsicles, we've started to add a layer of peanut butter. They are amazing!
You will need:
A couple of ripe bananas
a few tbsp of your favorite peanut butter (we use all natural peanut butter to keep the popsicles from getting too sweet)
one bag of dark chocolate or semi-sweet chocolate chips
Toothpicks
First slice the bananas into an even number of slices.
Next add a daub of peanut butter to one of the slices. Then, using a toothpick, stick a second slice to the top.
This can get messy.
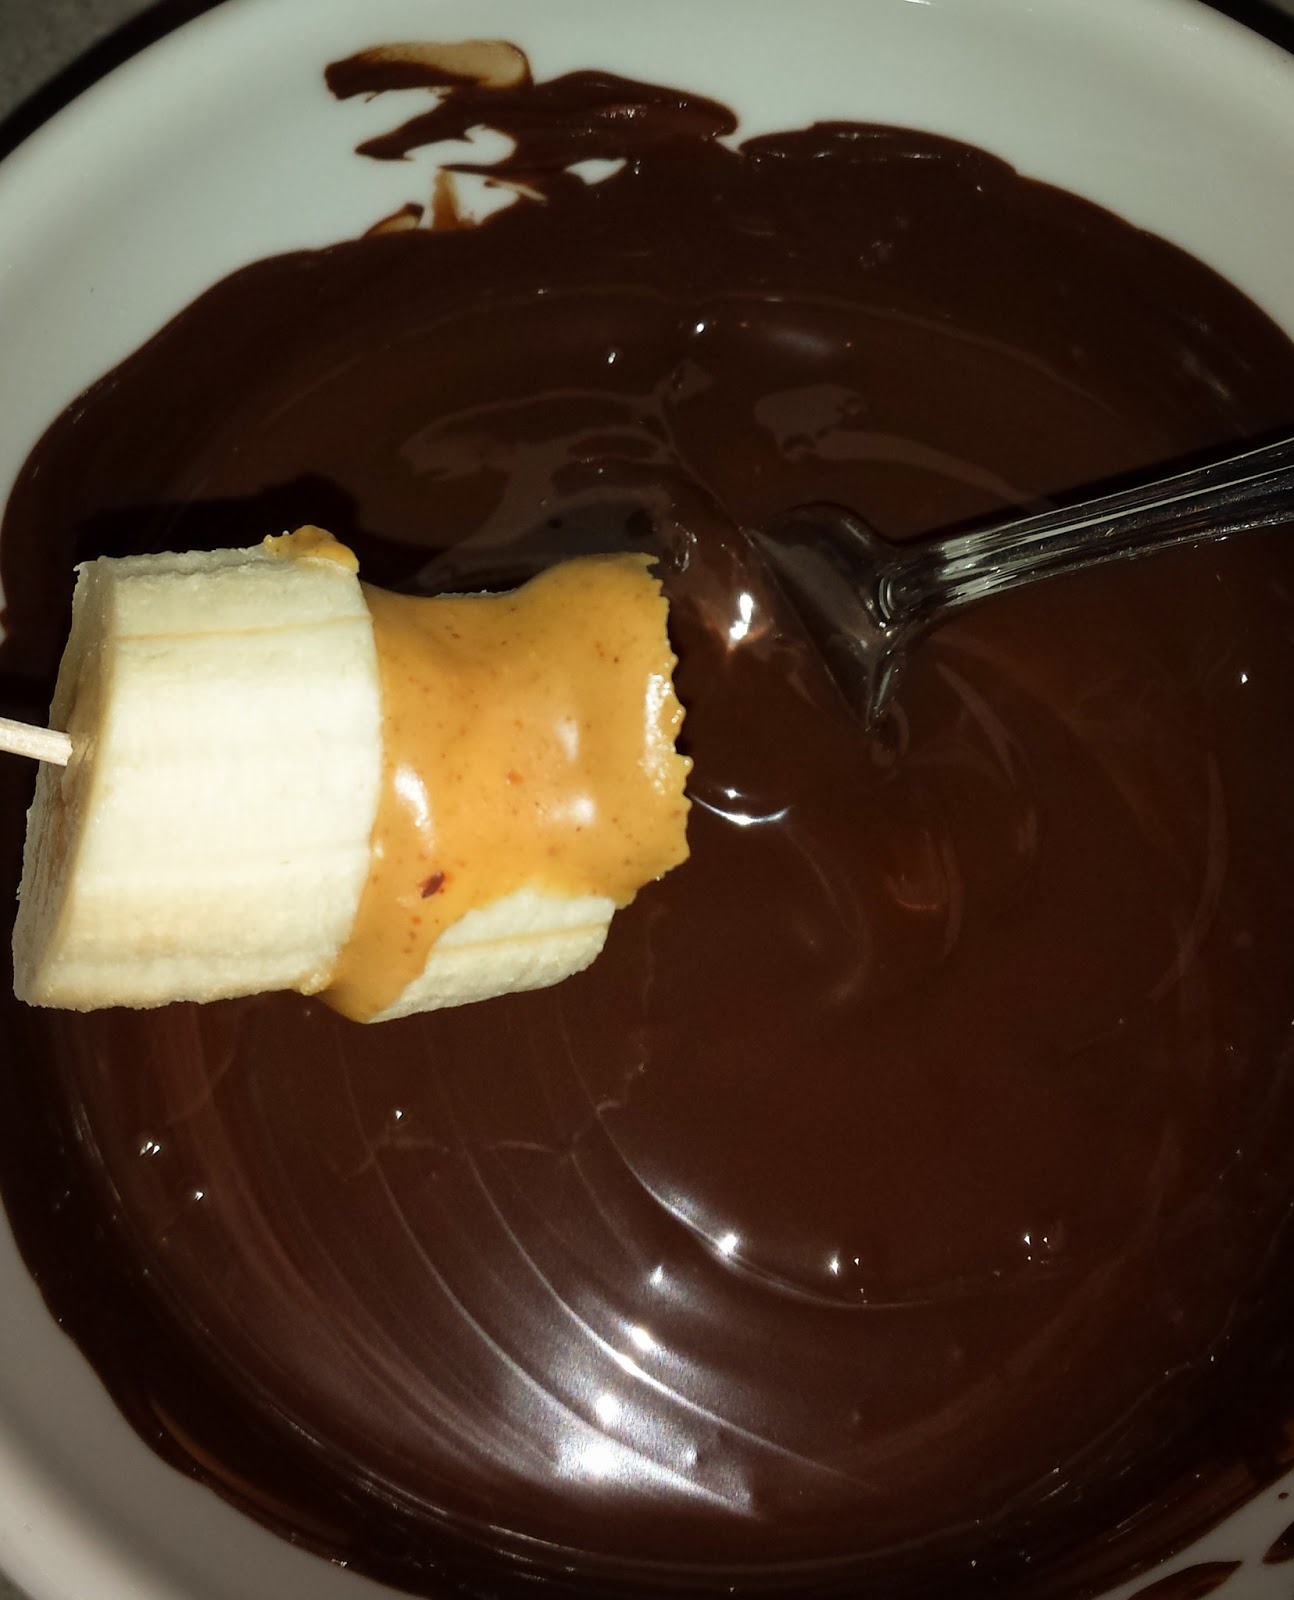
Once you get all of your banana/peanut butter sandwiches made pop them into the freezer for a bit. It'll help when you dip them. While you're waiting, melt your chocolate in a shallow bowl.
I use a spoon to make sure I get a nice even coating.
Put them back into the freezer for a while to harden the chocolate. After about 15 minutes you will have amazing (sort of) healthy popsicles.
But get one quick....they don't last long around here!
Monday, June 17, 2013
Eat from the Street - Beacon Food Forest
Seattle has long been a place where urban living and nature have coexisted. We boast being one of the top 10 cities in the US for access to parks. We are called the Emerald City even. So it should come as no surprise that planning and construction is underway for an entirely edible and FREE forest of food. The Beacon Food Forest is underway next door to Jefferson Park in Beacon Hill. The Food Forest is being designed to mimic a natural ecosystem but substituting edible nuts, fruits, veggies and herbs throughout. Phase One, consisting of building the fruit and nut tree grove, has already begun. The Food Forest will progress over the next several years. If you like to visit and/or volunteer at the Forest, more information can be found here: http://beaconfoodforest.weebly.com/
Saturday, June 1, 2013
Explore Imagination - Fantasy Exhibit @ The EMP
There is a inherent draw to fantastic worlds and stories in all of us. Mythical creatures, epic battles, magical duels...these things fill the stories and games that entertain us. So the Fantasy exhibit at the EMP is a great peak behind the curtain of the things that captivate us. With items from The Wizard of Oz to original manuscript pages from The Lord of The Rings (Plus a Dragon!) The exhibit gives a taste of many of the iconic stories from the fantasy genre. The only downside is you will want more. As an added bonus, your ticket to the Fantasy exhibit also gives you admission to the Can't Look Away Horror exhibit, the Icons of Science Fiction exhibit and the entire EMP Music exhibit. (we talk about it here)
EMP Fantasy Exhibit
Thursday, May 9, 2013
Homemade Marshmallows - I Will Create Food!
In our house marshmallows are not just for camping trips. While they are a coveted treat while sitting around the campfire, they get just as much love throughout the rest of the year. As much as we love them, we have noticed the store bought versions have become more dense and sugary lately. After looking into making them ourselves, we discovered that not only are they fairly easy to make, but the homemade marshmallows are lighter, fluffier and have more flavor.
You will need:
3/4 cup cold water
3/4 cup granulated sugar
1/2 cup light corn syrup
1/8 teaspoon fine salt
2 teaspoons pure vanilla extract
Next whisk the gelatin with 1/2 cup of the cold water. Put this on the side for a minute.
Now add the sugar, 1/4 cup of the corn syrup, remaining 1/4 cup water, and salt in a medium saucepan. Bring it to a boil, stirring until it hits 240 degrees. While waiting for the right temperature, microwave the gelatin for 30 seconds. Add the rest of the corn syrup and the gelatin to you mixer and start it on low.
Once the mixture on the stove reaches 240 degrees add it to the mixer also. Turn the speed up to medium and let it whip for 5 min. After 5 min increase the speed to medium high for another 5 minutes.
Pour your marshmallow fluff into the prepared pan, using a spatula to spread it evenly to the edges.
Dust the top with more of the powdered sugar/corn starch mixture. (put the rest of the powder mixture on the side to use after the marshmallows set up.) Put the pan in a cool, dry place for at least 4 hours (overnight works best)
You will need:
3/4 cup powdered sugar
1/2 cup cornstarch or potato starch
Cooking spray, for coating the baking pan
4 1/2 teaspoons unflavored powdered gelatin (about 2 [1/4-ounce] packets) 3/4 cup cold water
3/4 cup granulated sugar
1/2 cup light corn syrup
1/8 teaspoon fine salt
2 teaspoons pure vanilla extract
Besides the ingredients you will also need an 8x8 pan and an electric mixer with a whisk attachment
Start by mixing the powdered sugar and corn starch together. This will be a powder coating to prevent the marshmallows from sticking together.
Prepare the 8x8 pan by lightly spraying it with cooking spray. (to achieve a lighter coating, refrain from letting your 4-year-old from doing this step) Add a couple of spoonfuls of the powdered sugar/corn starch mixture and shake the pan until it has a nice even coating. Now add the sugar, 1/4 cup of the corn syrup, remaining 1/4 cup water, and salt in a medium saucepan. Bring it to a boil, stirring until it hits 240 degrees. While waiting for the right temperature, microwave the gelatin for 30 seconds. Add the rest of the corn syrup and the gelatin to you mixer and start it on low.
Once the mixture on the stove reaches 240 degrees add it to the mixer also. Turn the speed up to medium and let it whip for 5 min. After 5 min increase the speed to medium high for another 5 minutes.
Your mixture should be looking mighty fluffy at this point. Add your vanilla (and/or any other flavors you want) and increase the speed to the highest setting for a few minutes.
Dust the top with more of the powdered sugar/corn starch mixture. (put the rest of the powder mixture on the side to use after the marshmallows set up.) Put the pan in a cool, dry place for at least 4 hours (overnight works best)
When they are all set up, flip the pan over onto a cutting board. Use a pizza cutter dusted with your powder mixture to cut out bite-sized marshmallows.
After cutting, toss each piece in the powder mixture to prevent them from sticking together and store in an airtight container. They will keep for several weeks (although they probably won;t be around for that long)
Subscribe to:
Posts (Atom)


First